Ipe - Make Creating Presentations Great (Again)
Since a few people started to use Ipe lets put up a page to collect templates and useful information. For everybody now asking what Ipe is, its the solution to 'all' your slide and poster creation troubles 😉 or in other words a really cute 'little' program. At its base Ipe is a vector graphics editor which supports setting text in LaTeX. Together with templates it can be used to create posters and slides very fast, while you are still able to use full LaTeX support in the text.
You can download Ipe or find it in your distributions repository (Ubuntu: ipe, Arch: ipe in the AUR). Note that most up to date versions are usually not available through the distribution repositories.
Templates
Templates for presentations and for posters exist and can be used by simply opening the <name>.ipe file. If you need to modify something in the stylesheets feel free to ask Soeren Terziadis or Martin Nöllenburg.
We usually give one Ipe Tutorial per Semester, the slides can be found here.
Another collection of ipe tricks is maintained by the AGA group at TU Eindhoven.
Ipelets
Ipe can be extended via so called Ipelets. These are scripts written in Lua. More information and a 'complete' list can be found in the Wiki. You install an Ipelet by copying the lua script file to one of the Ipelet directories. On your system you can find these via 'Help -> Show configuration'. Afterwards the Ipelet is available under 'Ipelets' in the menu.
Presentations
Ipe comes with the ability to create multiple pages. Every page is a canvas to draw on. On a page you can have additional structure called layers and views. Layers do the expected and provide you with just multiple virtual canvases on the same page. The trick to making a presentation are the views. A page can have multiple views and for every one of them you define which layers are visible in the left hand toolbar. In the resulting pdf file every view is one slide. Coming from beamer the views are basically what you implicitly create with an \only<> command.
To make presentation creation easier here a few useful Ipelets:
The Presentation Ipelet allows you to create beamer style boxes around elements. It is not necessary to create a presentation.
The Decorator Ipelet creates simpler boxes often useful on posters.
The Pagenumbers Ipelet extends the pagenumbering capabilities of Ipe. For example it allows you to move the numbers to the top.
Working With Graphs
There are two ipelets to make working with graphs a little easier. In general it is better to draw a graph by using marks for nodes and lines or curves for edges and not draw complex shapes for nodes unless necessary.
The Graph Ipelet makes working with drawings depicting graphs a little easier. The main feature is the graph mode. If you draw a graph by placing marks and you now press Ctrl+e to edit the mark you can drag it around and upon leaving editing mode with spacebar all connected lines will move with the mark.
The Graphdrawing Ipelet makes use of Tikz to draw a selected set of marks and lines . To install it you need to follow the instructions on the github page from the download link.
Colors
If you need more colors a messy solution is to include the colors.isy file which provides you with the complete X11 color palette. A more elegant way is to generate a specific palette fitting the style of whatever you are working on. A good way to get nice palettes is Colorbrewer or if you need something more specific the webpage iWantHue. Colorbrewer is a collection of Color palettes with good distinct colors and it is present in a lot of plotting/statistic tools like ggplot.
Once you got the palette ready you can use this little python script Fabian wrote. It zips a list of colors and names and prints the Ipe tags to insert in your style file. It also supports Colorbrewer. You simply specify the name of the palette and the names you want to use for the colors. The script needs the 'palettable' python package.
Ipetools
Ipetools is a collection of scripts to convert a couple of formats to Ipe. Currently there is support to convert SVG, PDF (text does usually not work) and FIG. For Linux they might be available via your package manager (Ubuntu: ipe-tools, Arch: ipe-tools-git in the AUR).
Secret Tip Section
Since Ipe is basically a one man development project the documentation is lacking in some places. Here a few tips and really useful features which are not well or not at all documented.
Selecting things
Selecting shapes behaves differently depending on from where you drag. Going from top left to bottom right you will select a shape if and only if its bounding box is in the selection rectangle. Dragging from the bottom right up to top left a shape is selected if and only if its bounding box intersects the selection rectangle.
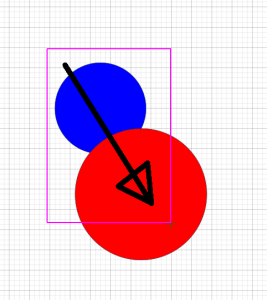
Selects only the blue circle.
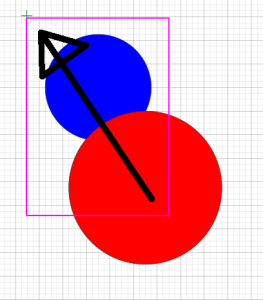
Selects blue and red circle.
Clipping Path
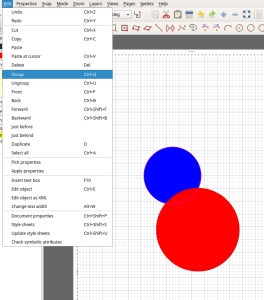
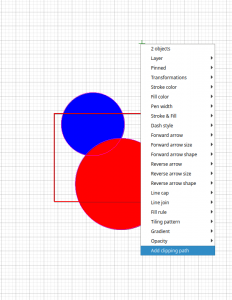
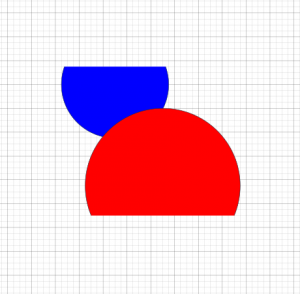
Suppose you have a figure or a picture and you want to show only some part of it. You can do this by adding a clipping path to a group object. A simple example: Draw two circles in ipe. Now put these two circles in a group (Mark the objects and Edit -> Group or press Ctrl+g). Now draw a rectangle over the group and select group and rectangle. In the context menu you now find an option to add a 'Clipping Path' which gives you a cut between the grouped object and the rectangle.
Angular Snap
The angular snap tool is sometimes a bit fiddly. The canvas has an origin, which is usually the top left corner. If you press F1 a green star will appear where your cursor is. Now the origin is the center of this star and when 'Angular Snap' is activated the cursor will snap to the shown angles. You can rotate this star by using F2 and reset the direction with Ctrl+F2. The star is hides again upon pressing Ctrl+F1. In the menu you find these options at the bottom of 'Snap'.


